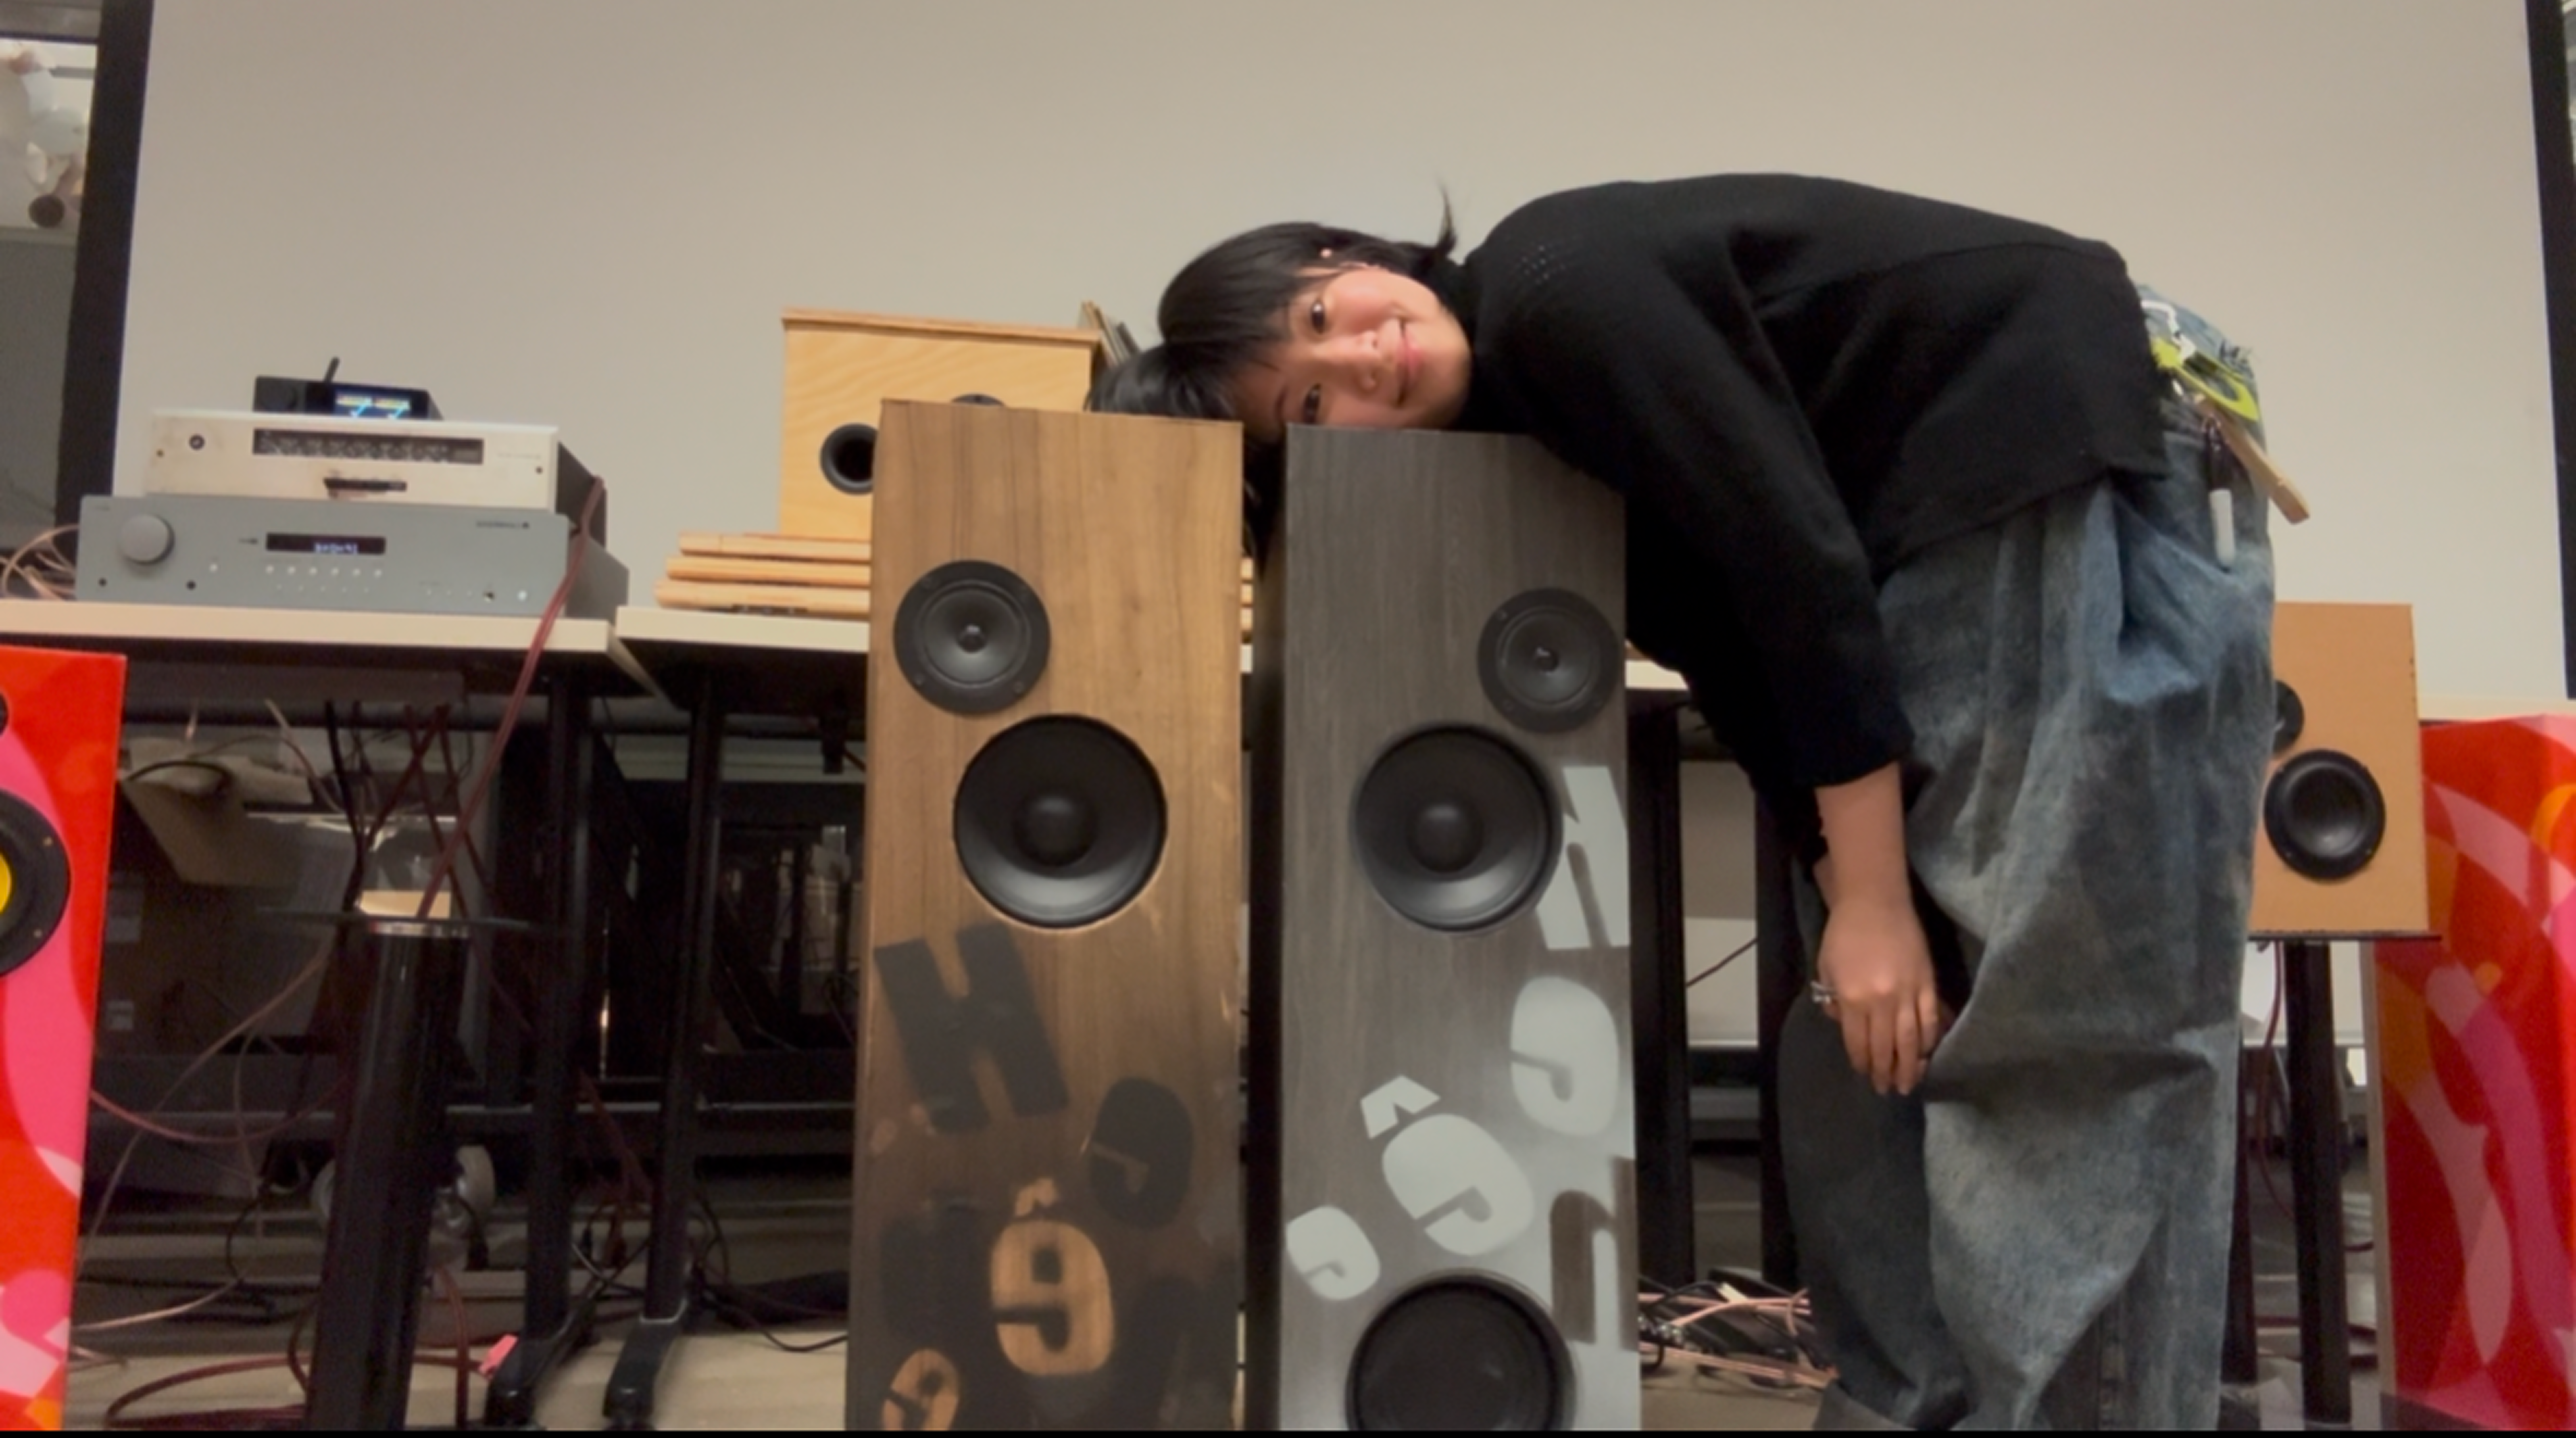
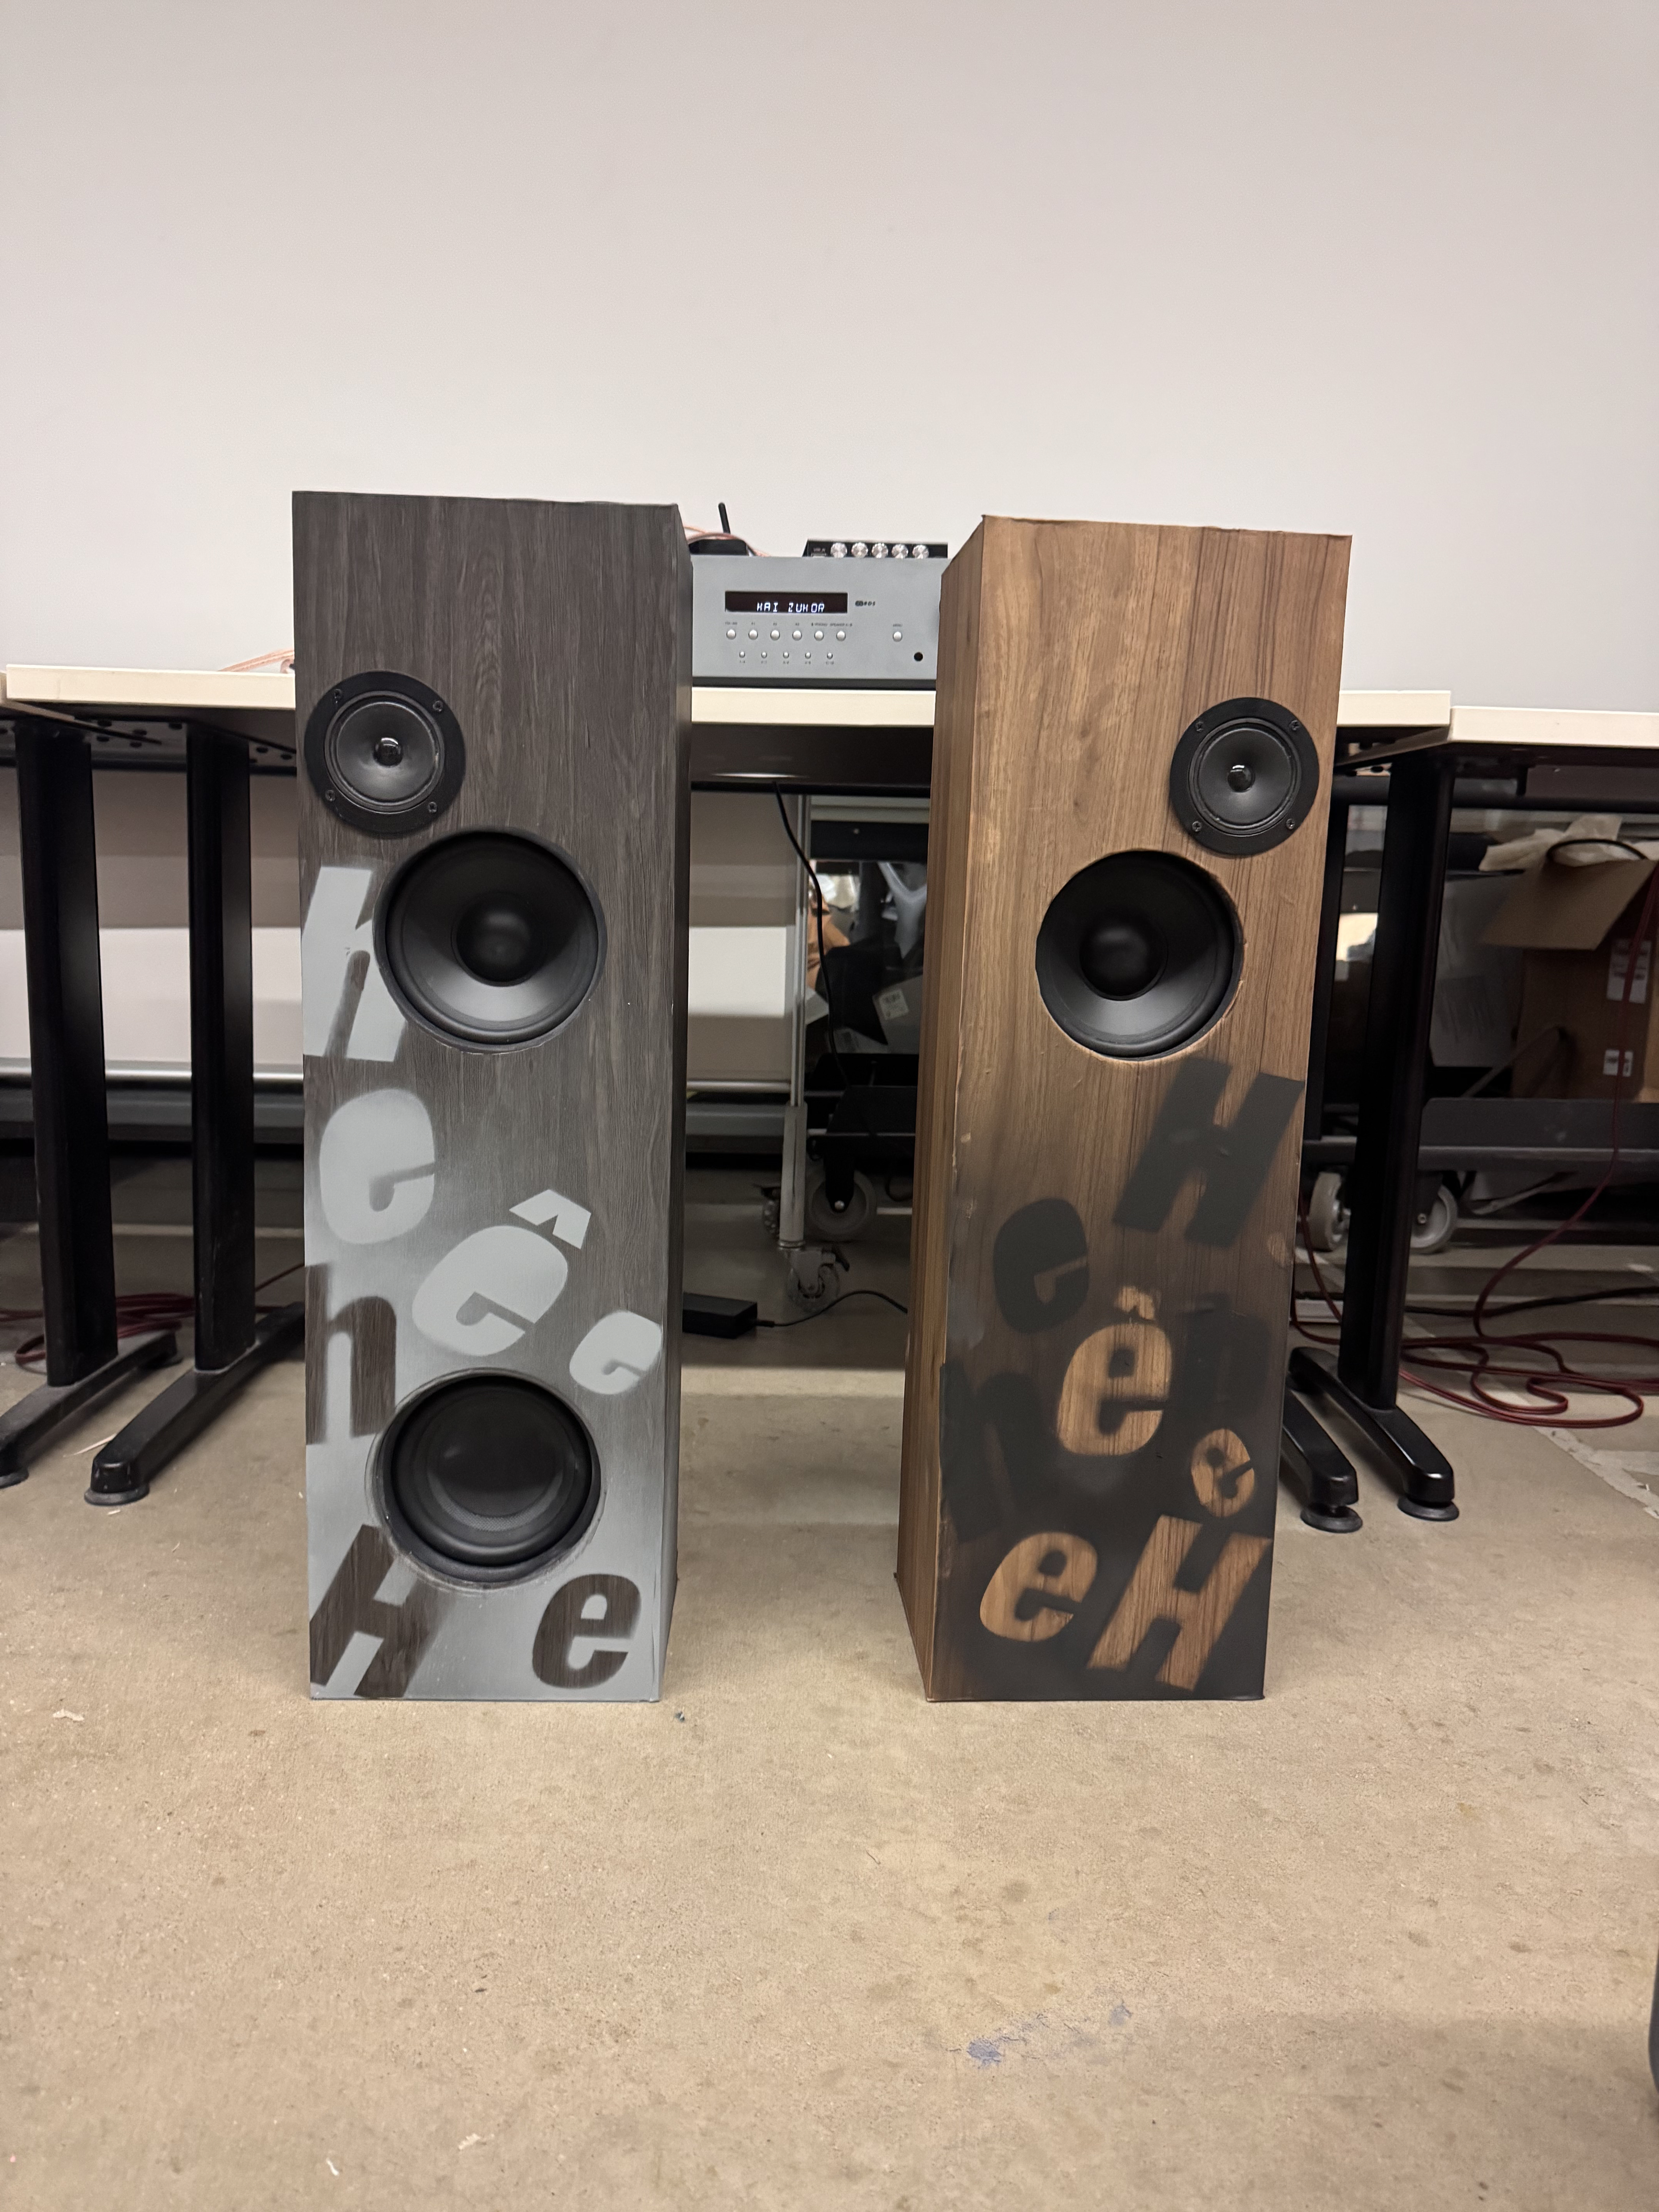
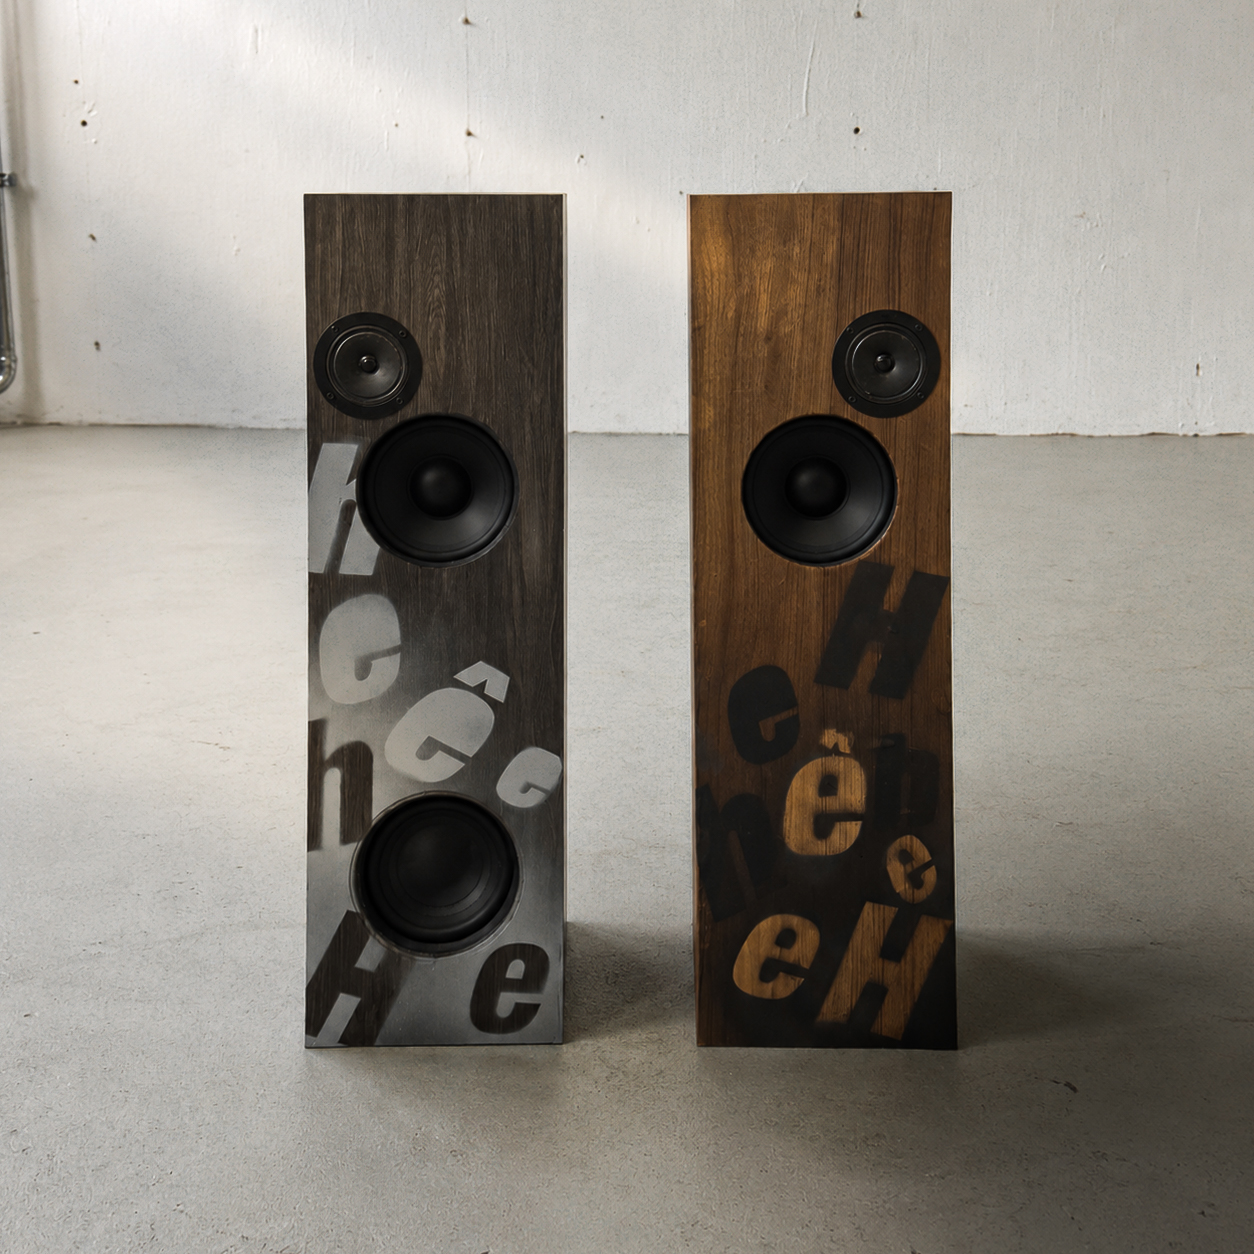
hhehehehe speakers
Industrial Design + Audio + Object
Overview
This class gave me the chance to build my own pair of speakers from scratch — tuned to my own music taste and my own house, not off some spec sheet. I wanted them to sound the way I actually listen, and look like something I'd genuinely want sitting in my room.
Along the way I learned the fundamentals of audio and what it actually means to design for sound, then let my own personality shape the final form.
- Role
- Chem Duong
- Focus
- Audio Product / Form / Prototyping
- Status
- Case Study In Progress
I love music, but the speakers I could actually buy never looked like me.
Most speakers on the market just don't match my aesthetic, and the ones that do sound good and are tuned to my own taste come at a price that's hard to justify. So why not just make my own?
My Music Taste
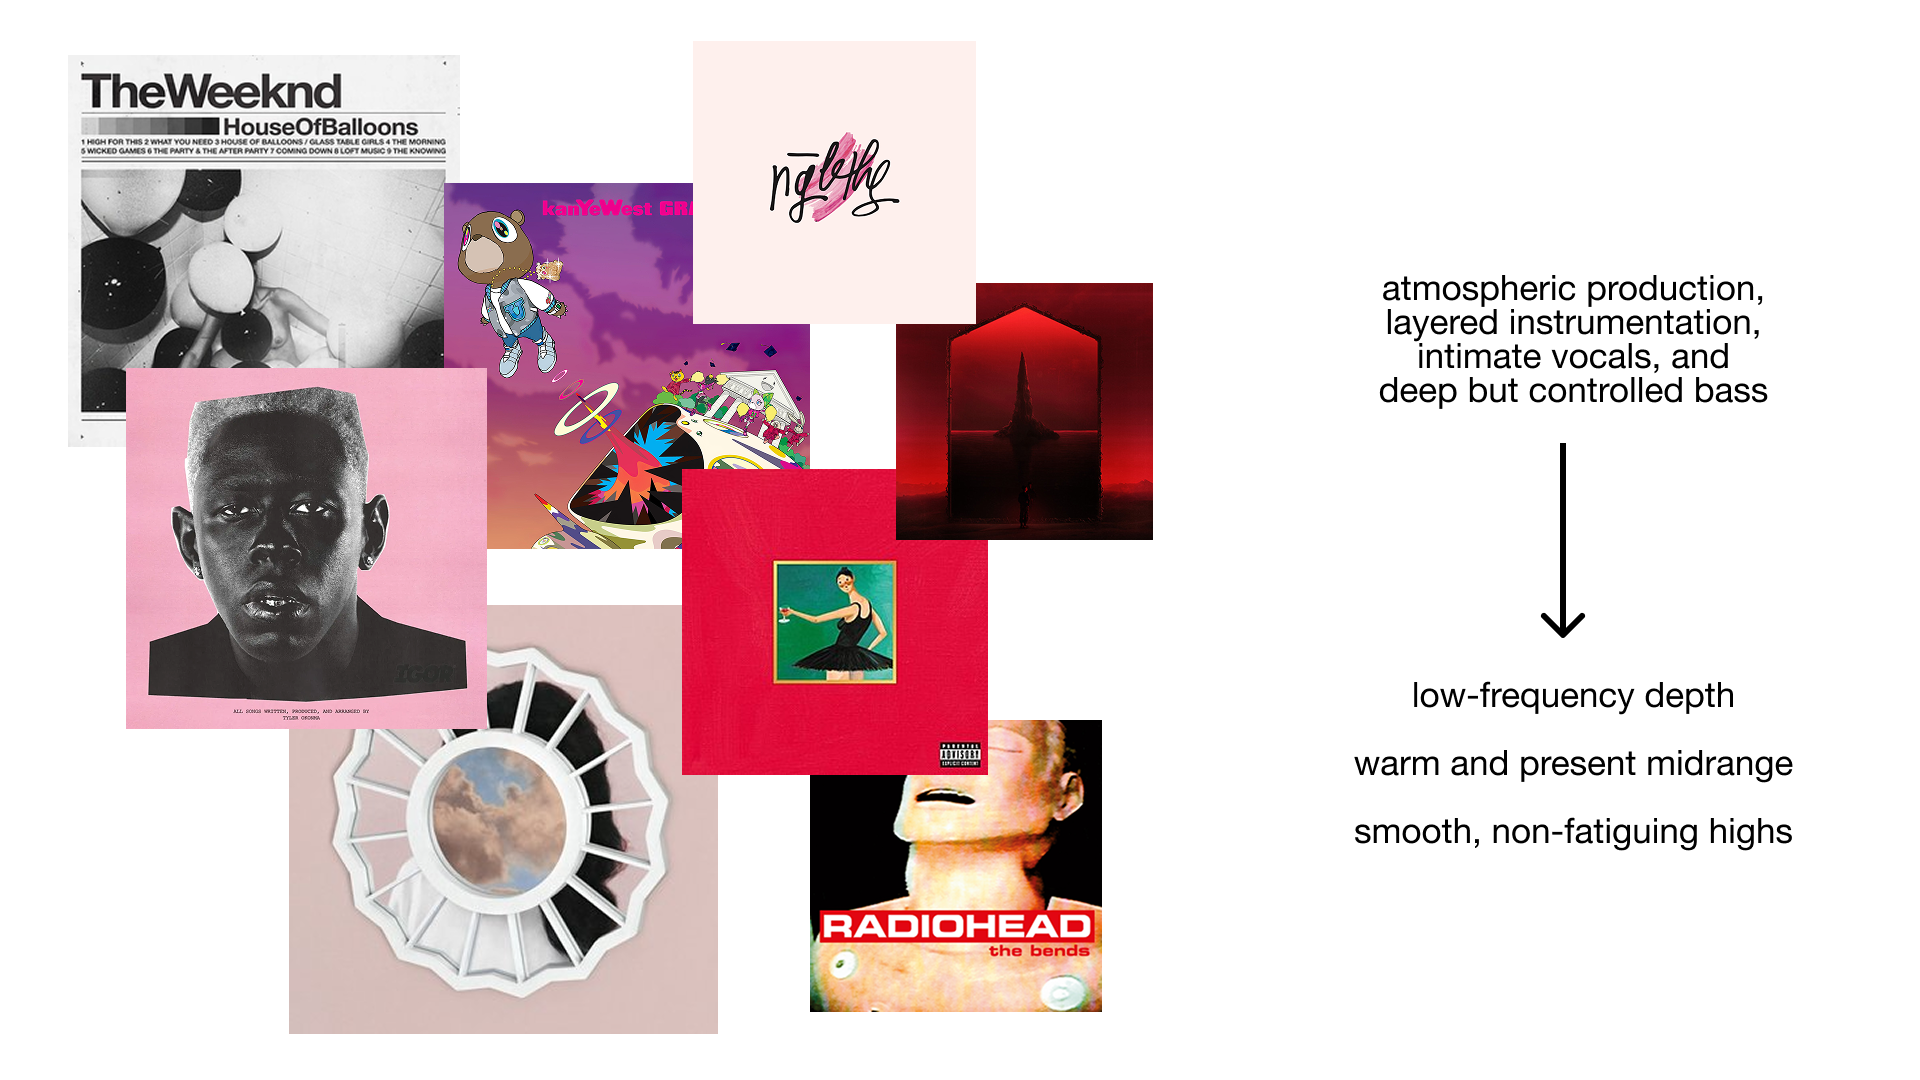
My music taste became the starting point for defining how I wanted the speakers to sound. My most-listened-to artists include The Weeknd, Kanye West, Mac Miller, and Tyler, the Creator, alongside Vietnamese pop and indie music. Across these genres, I found myself drawn to atmospheric production, layered instrumentation, intimate vocals, and deep but controlled bass.
From these listening habits, I identified three priorities for my speakers: low-frequency depth, a warm and present midrange, and smooth, non-fatiguing highs. Rather than designing for maximum loudness, I wanted the speakers to create an immersive and comfortable listening experience that could preserve both vocals and the atmospheric layers behind them.
Hardware Decision
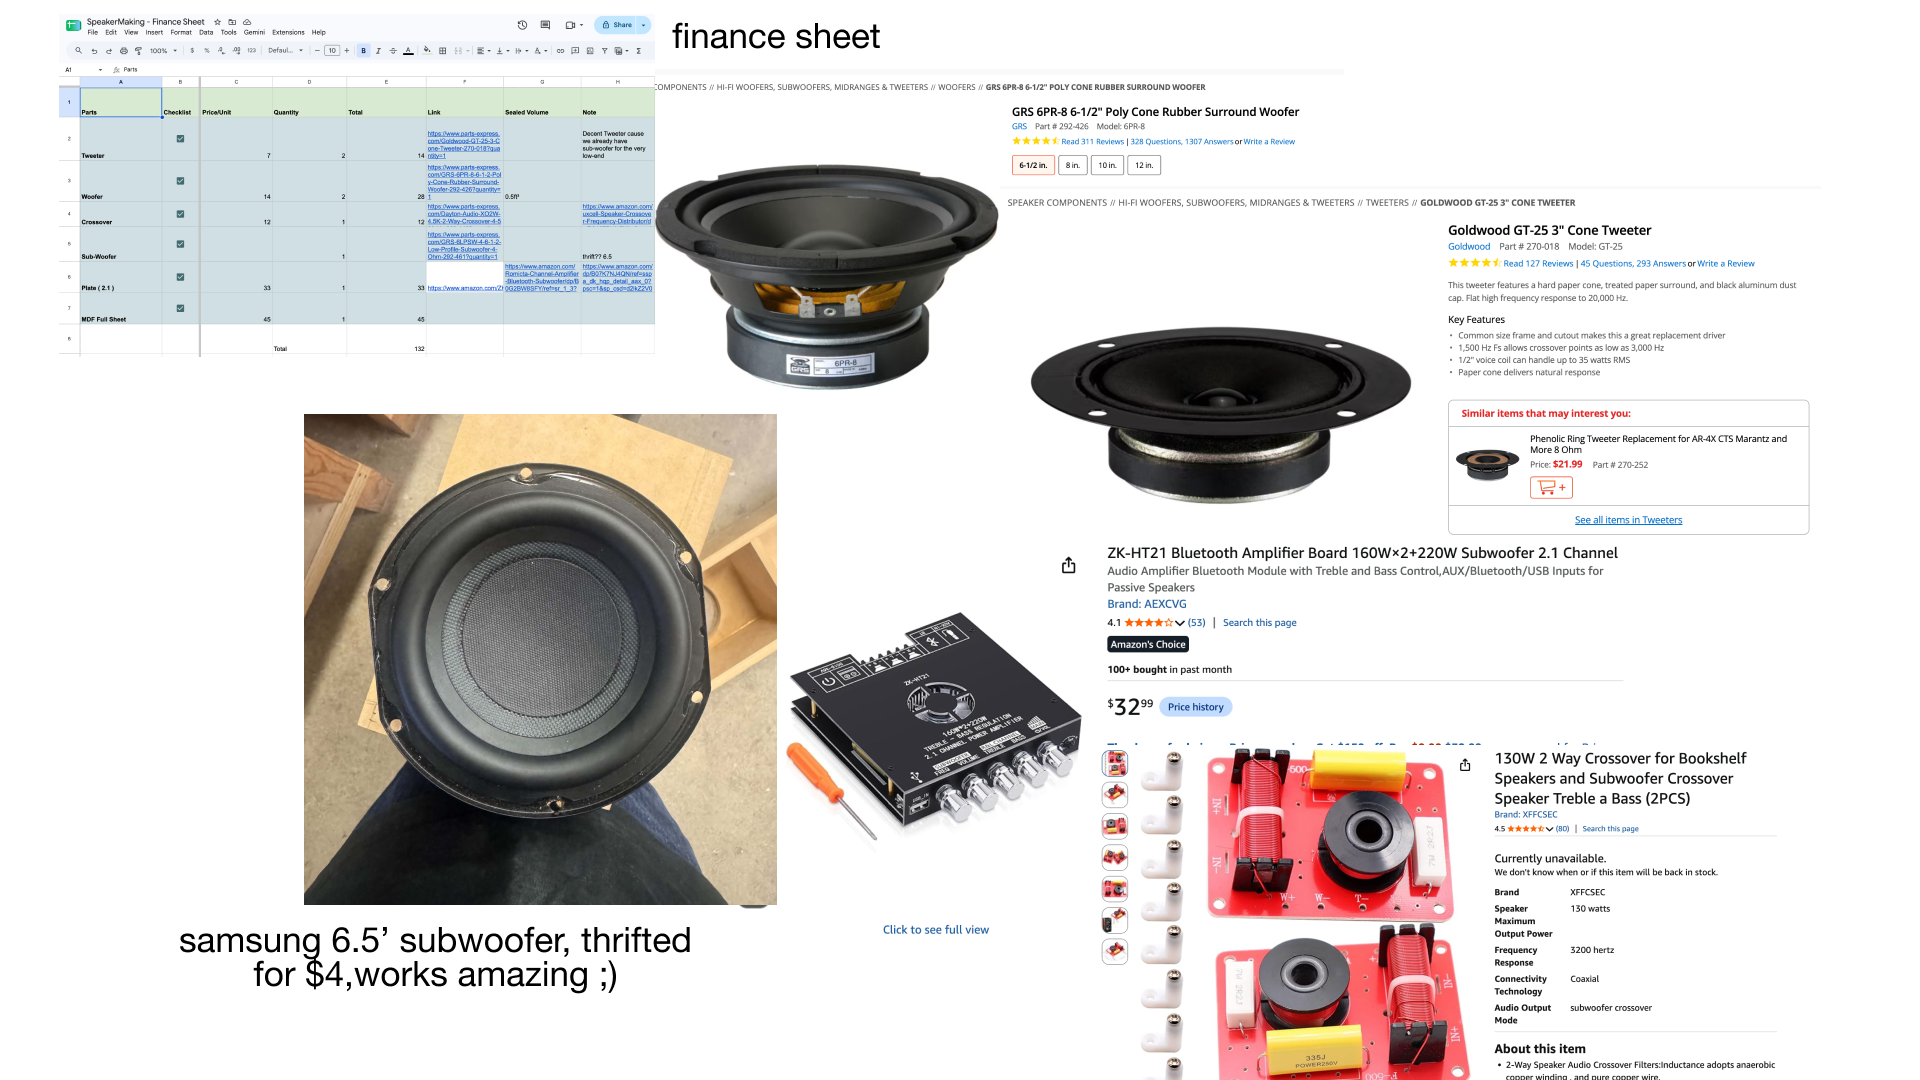
I compared full-range, 2-way, and 3-way systems to understand how each configuration divides the frequency spectrum. I ultimately chose a 2-way system supported by a dedicated subwoofer. The woofer and tweeter can focus on reproducing the main body and detail of the music, while the subwoofer independently extends the lowest frequencies. This also gave me more control without introducing the crossover complexity of a 3-way system.
Within my budget, I compared 5 to 6.5 inch woofers based on frequency response, sensitivity, impedance, enclosure requirements, and price. I prioritized spending more of my budget on the woofer because it reproduces much of the vocal, instrumental, and low-midrange body that defines the music I listen to, while looking for an affordable tweeter capable of producing smooth highs without becoming fatiguing.
Speaker Construction Decision
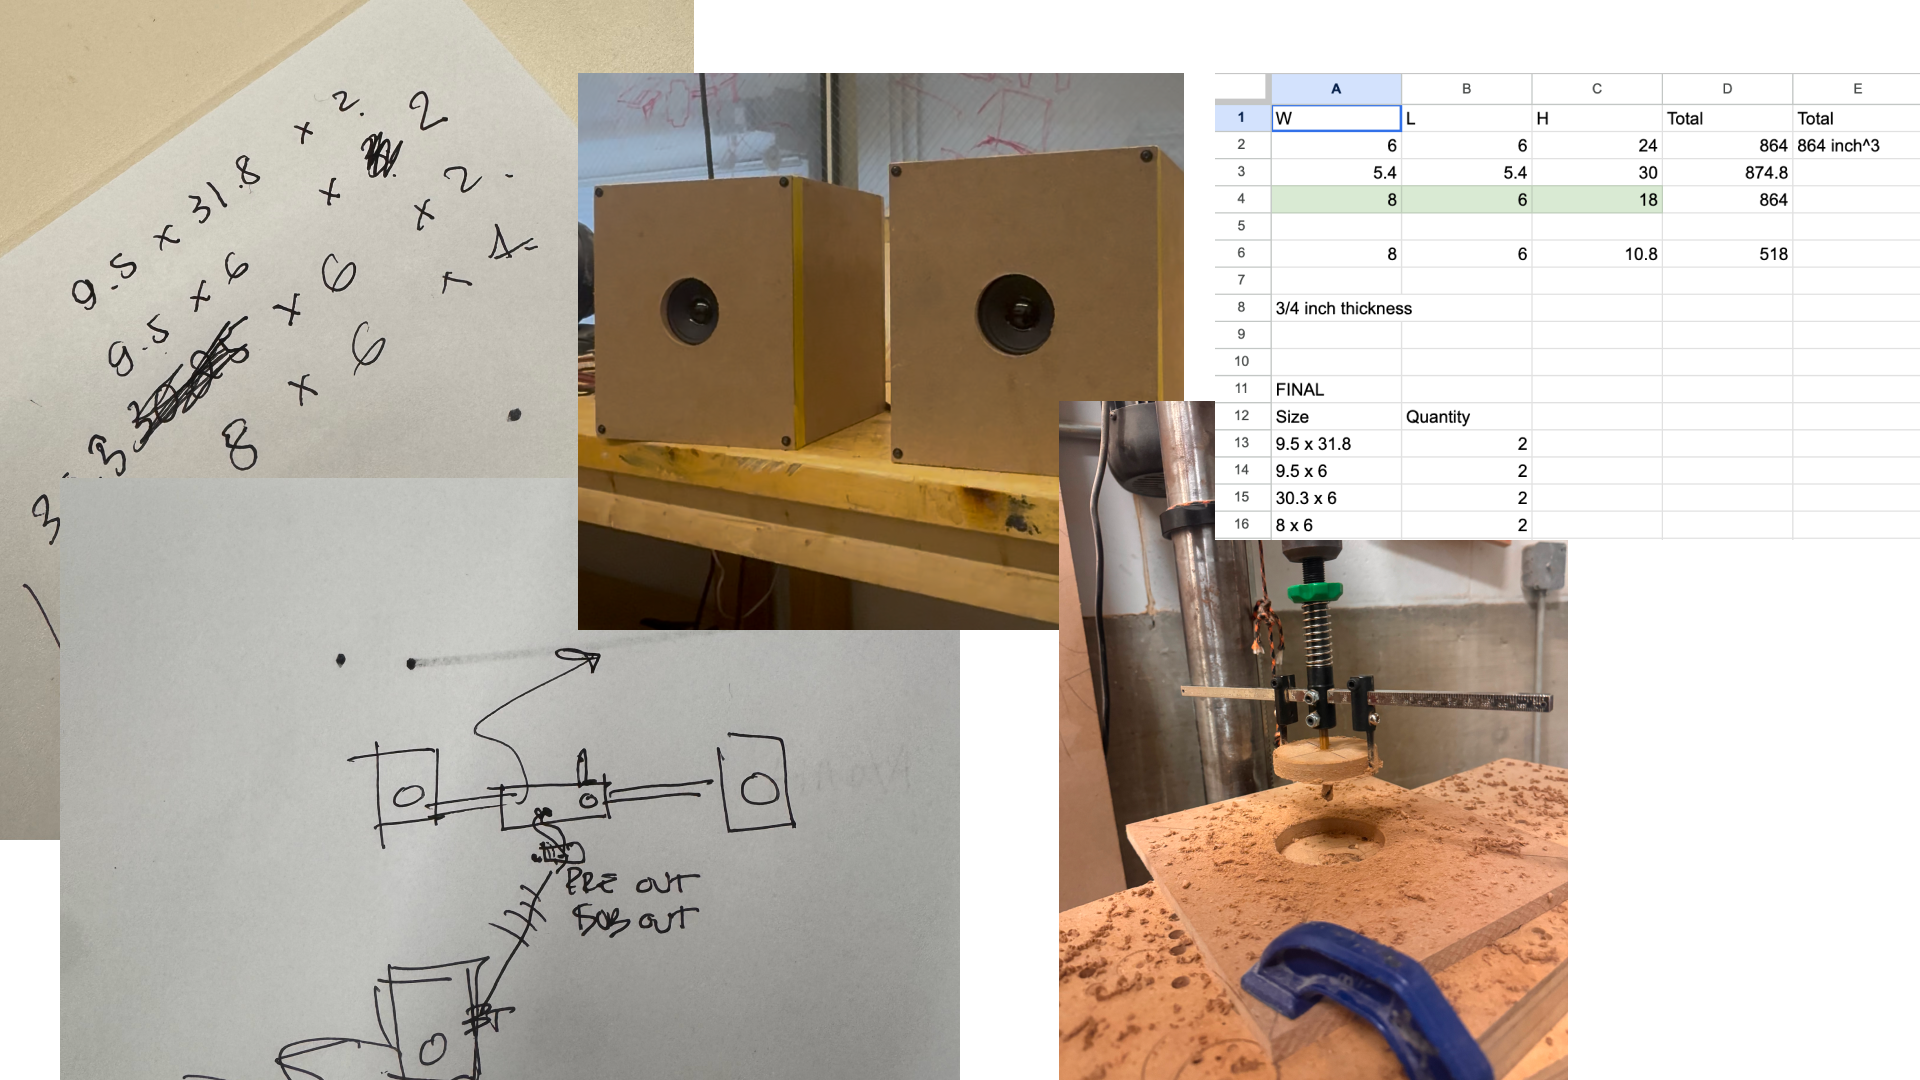
Before designing the final speakers, we built low-fidelity prototypes using the same drivers across different enclosure types to isolate how construction influences sound. Through listening and comparing sealed, ported, and passive-radiator designs, I found that while ported systems offered greater efficiency and bass extension, the sealed enclosure produced the tighter, more controlled sound and transient response I preferred.
This aligned well with my music taste, where atmospheric production, vocals, and layered instrumentation are just as important as bass. Since a dedicated subwoofer will handle the lowest frequencies, I ultimately chose a sealed enclosure to prioritize warmth, clarity, and control while giving myself greater flexibility to explore the speaker's final form and materials.
3D Model
I created a 3D model to get a better sense of the construction, panel count, and sizing for each panel before moving into the CNC steps. The decoration itself would be handled with a free-style stencil approach.
Frame Construction
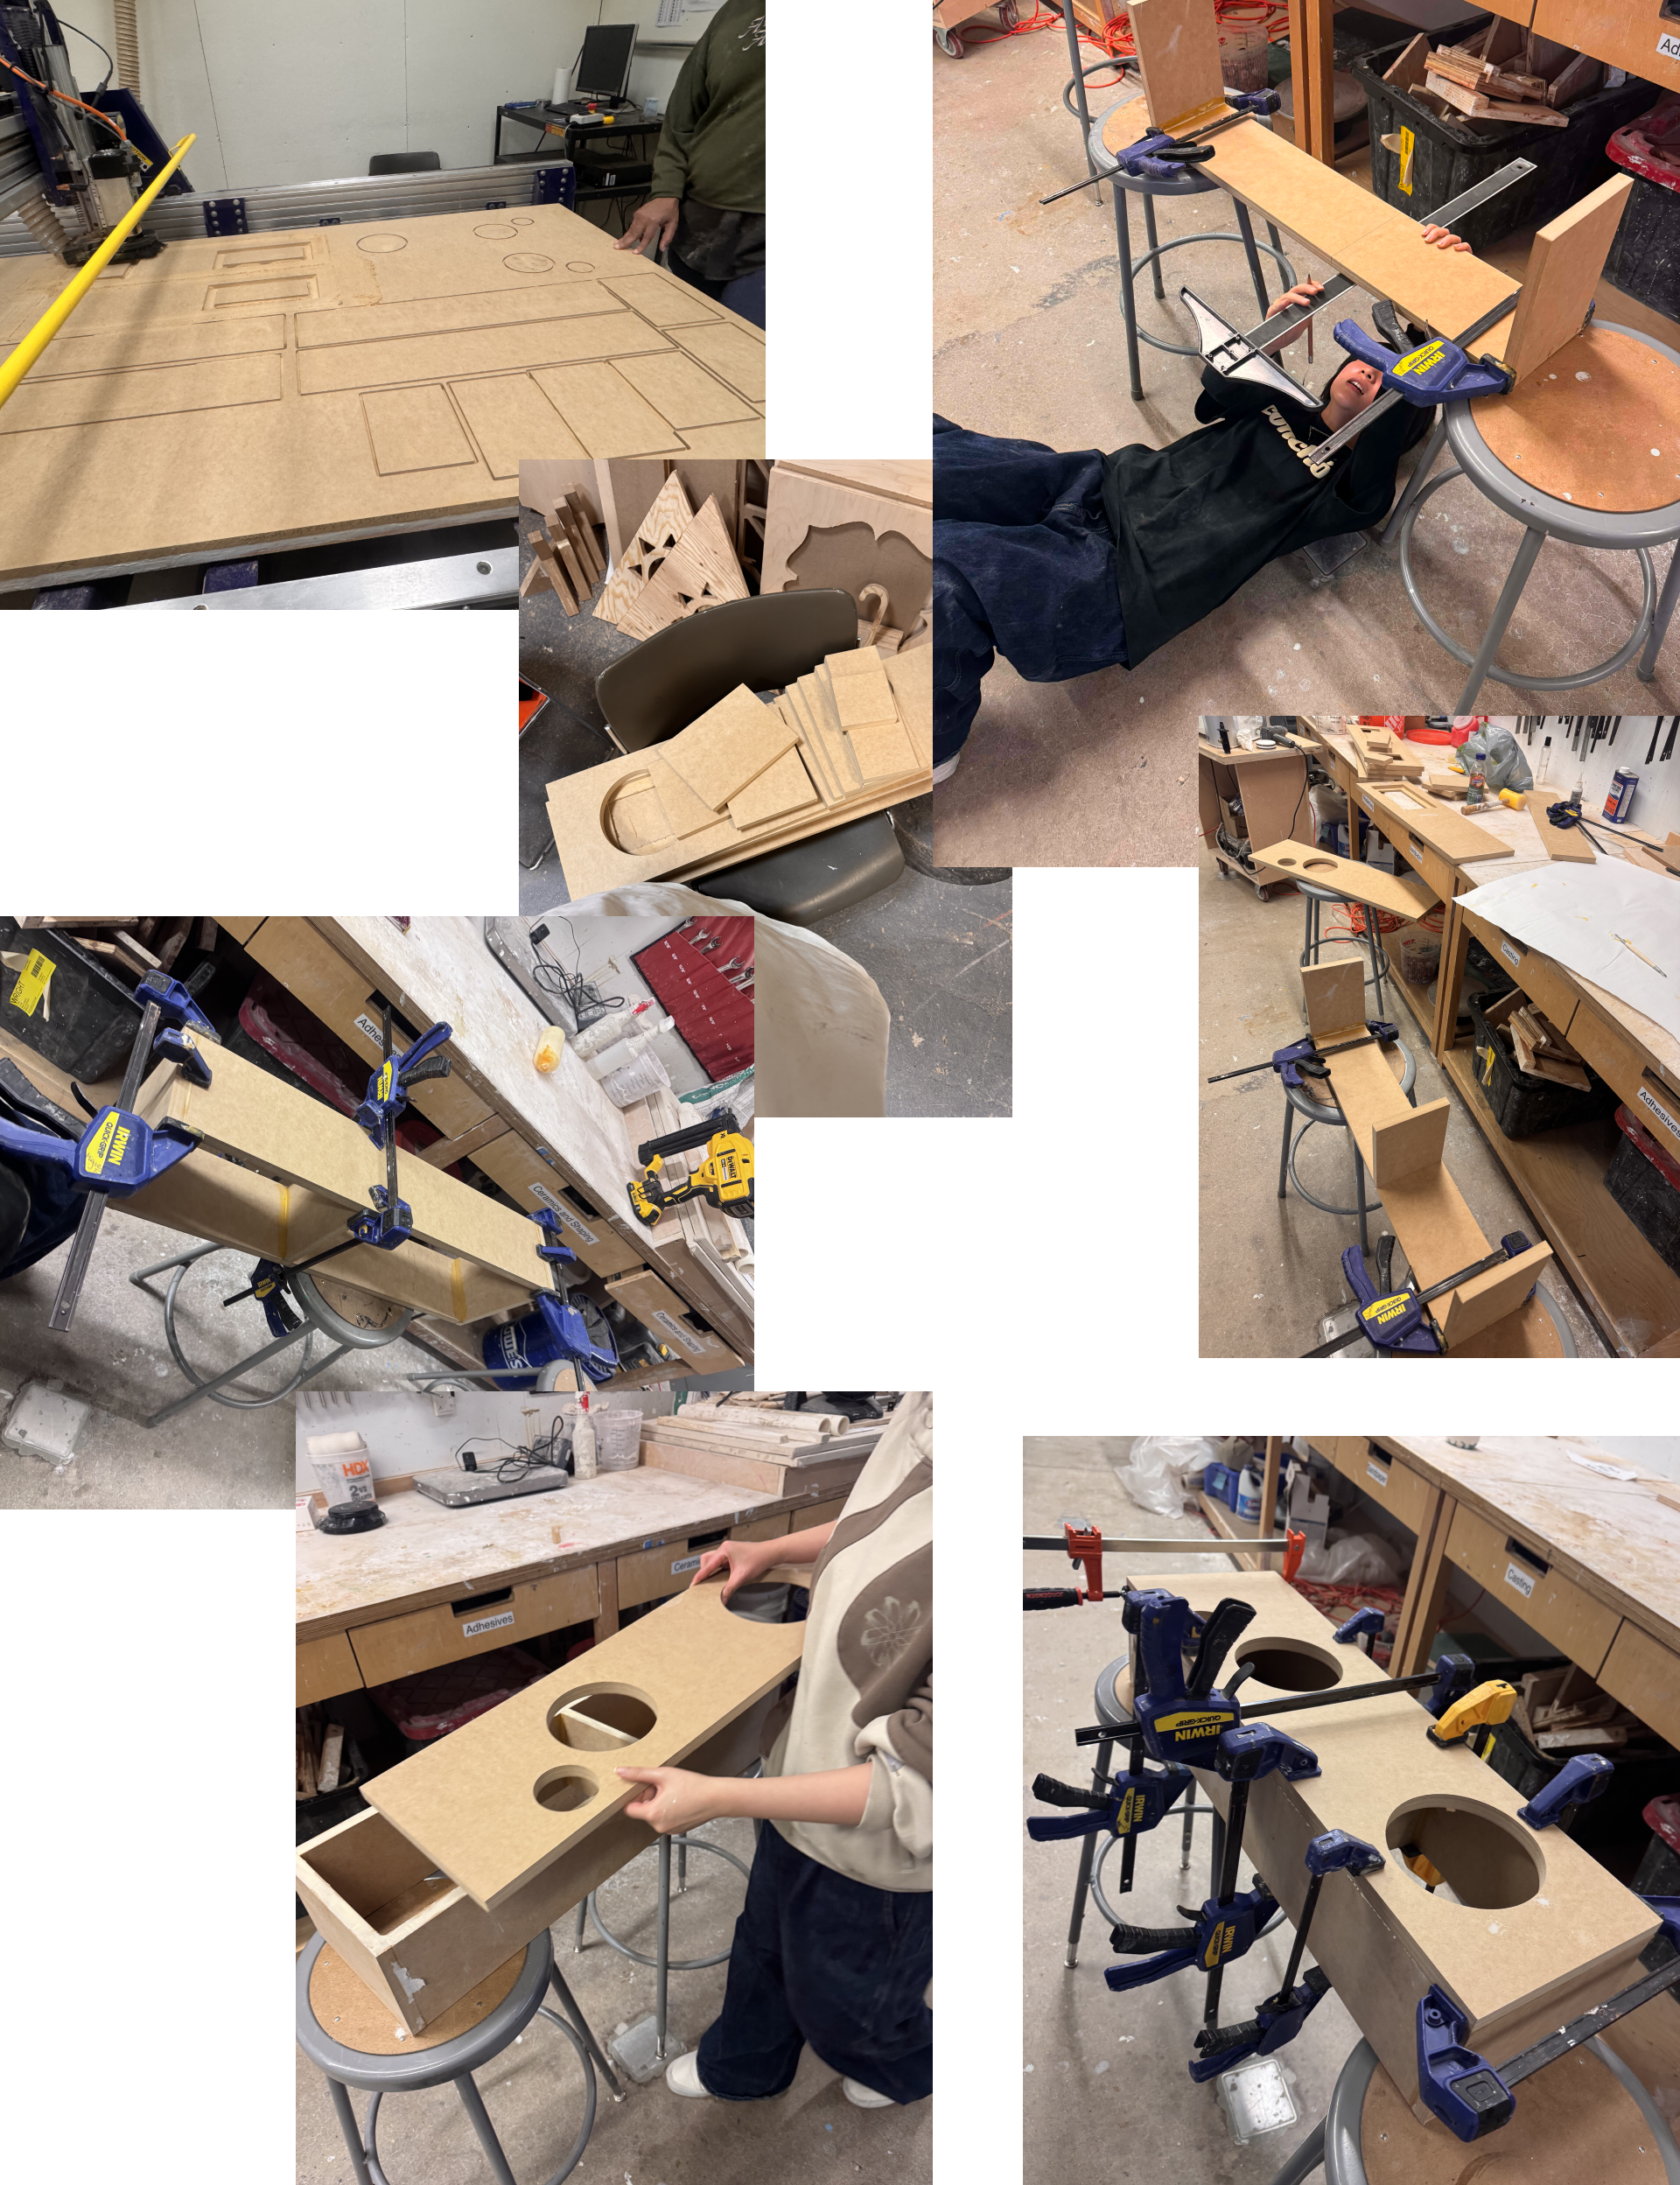
After calculating the internal volume each enclosure needed, I bought a full sheet of 3/4 inch MDF — the cheapest option that was still quality enough for the speakers and thick enough to support the tall 2.5 foot cabinets. I measured the drivers and worked out the panel dimensions and subwoofer section, then set up the CNC machine to cut every panel before gluing them together.
I also needed to keep the interior accessible for adjusting and tuning the sound after testing, so the glue-up had to be precise — any gaps would leak sound and throw off the tuning.
Wiring and Electronics
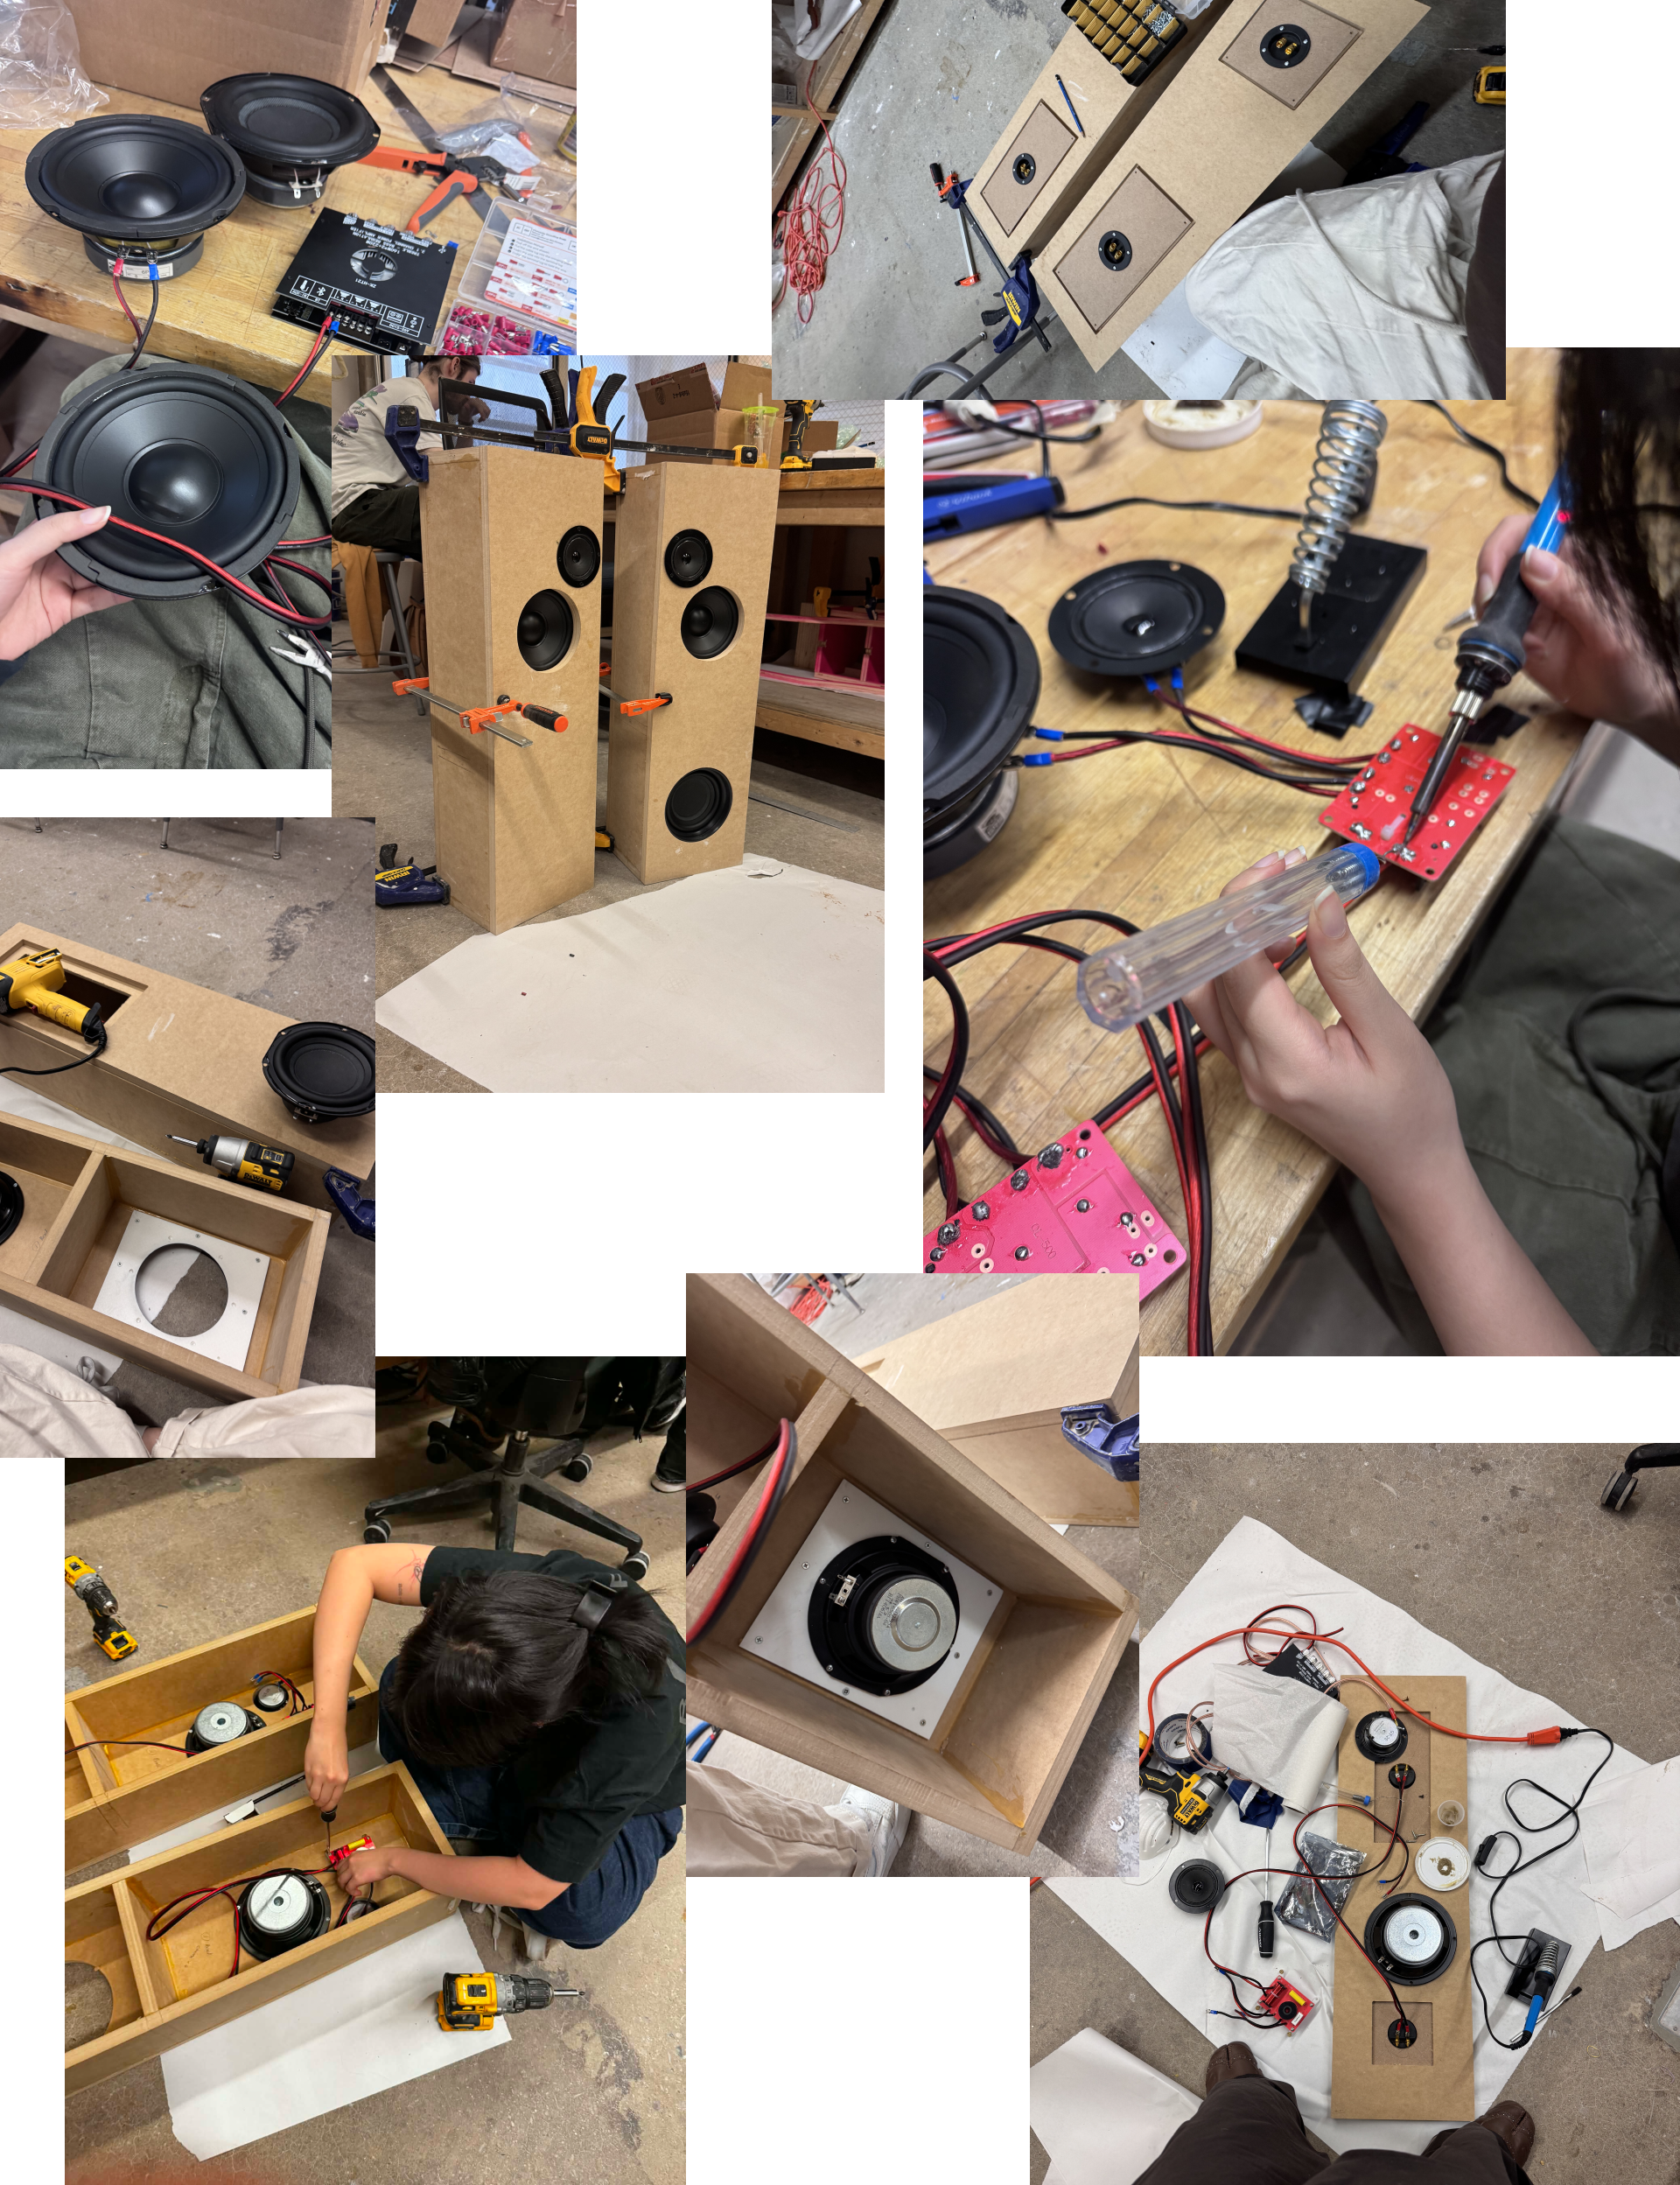
To support the dedicated subwoofer, I built the electronics around a 2.1 system, connecting two 2-way speakers and a subwoofer to an external Bluetooth amplifier. I cut, soldered, and terminated each wire with spade connectors, then routed the woofers and tweeters through 3,500 Hz 2-way crossovers with 12 dB/octave filters for both bass and treble, while wiring the subwoofer directly to its dedicated amplifier channel.
Before final assembly, I repeatedly tested the connections and sound while refining the wire routing to keep everything organized, secure, and serviceable inside the enclosure. During installation, I discovered that the subwoofer opening had been cut slightly too large, so I 3D modeled and printed a custom adapter that corrected the fit and allowed the driver to mount securely. This iterative process of wiring, testing, troubleshooting, and adapting helped turn the individual components into a clean and functional 2.1 system.
Vinyl Wrapping
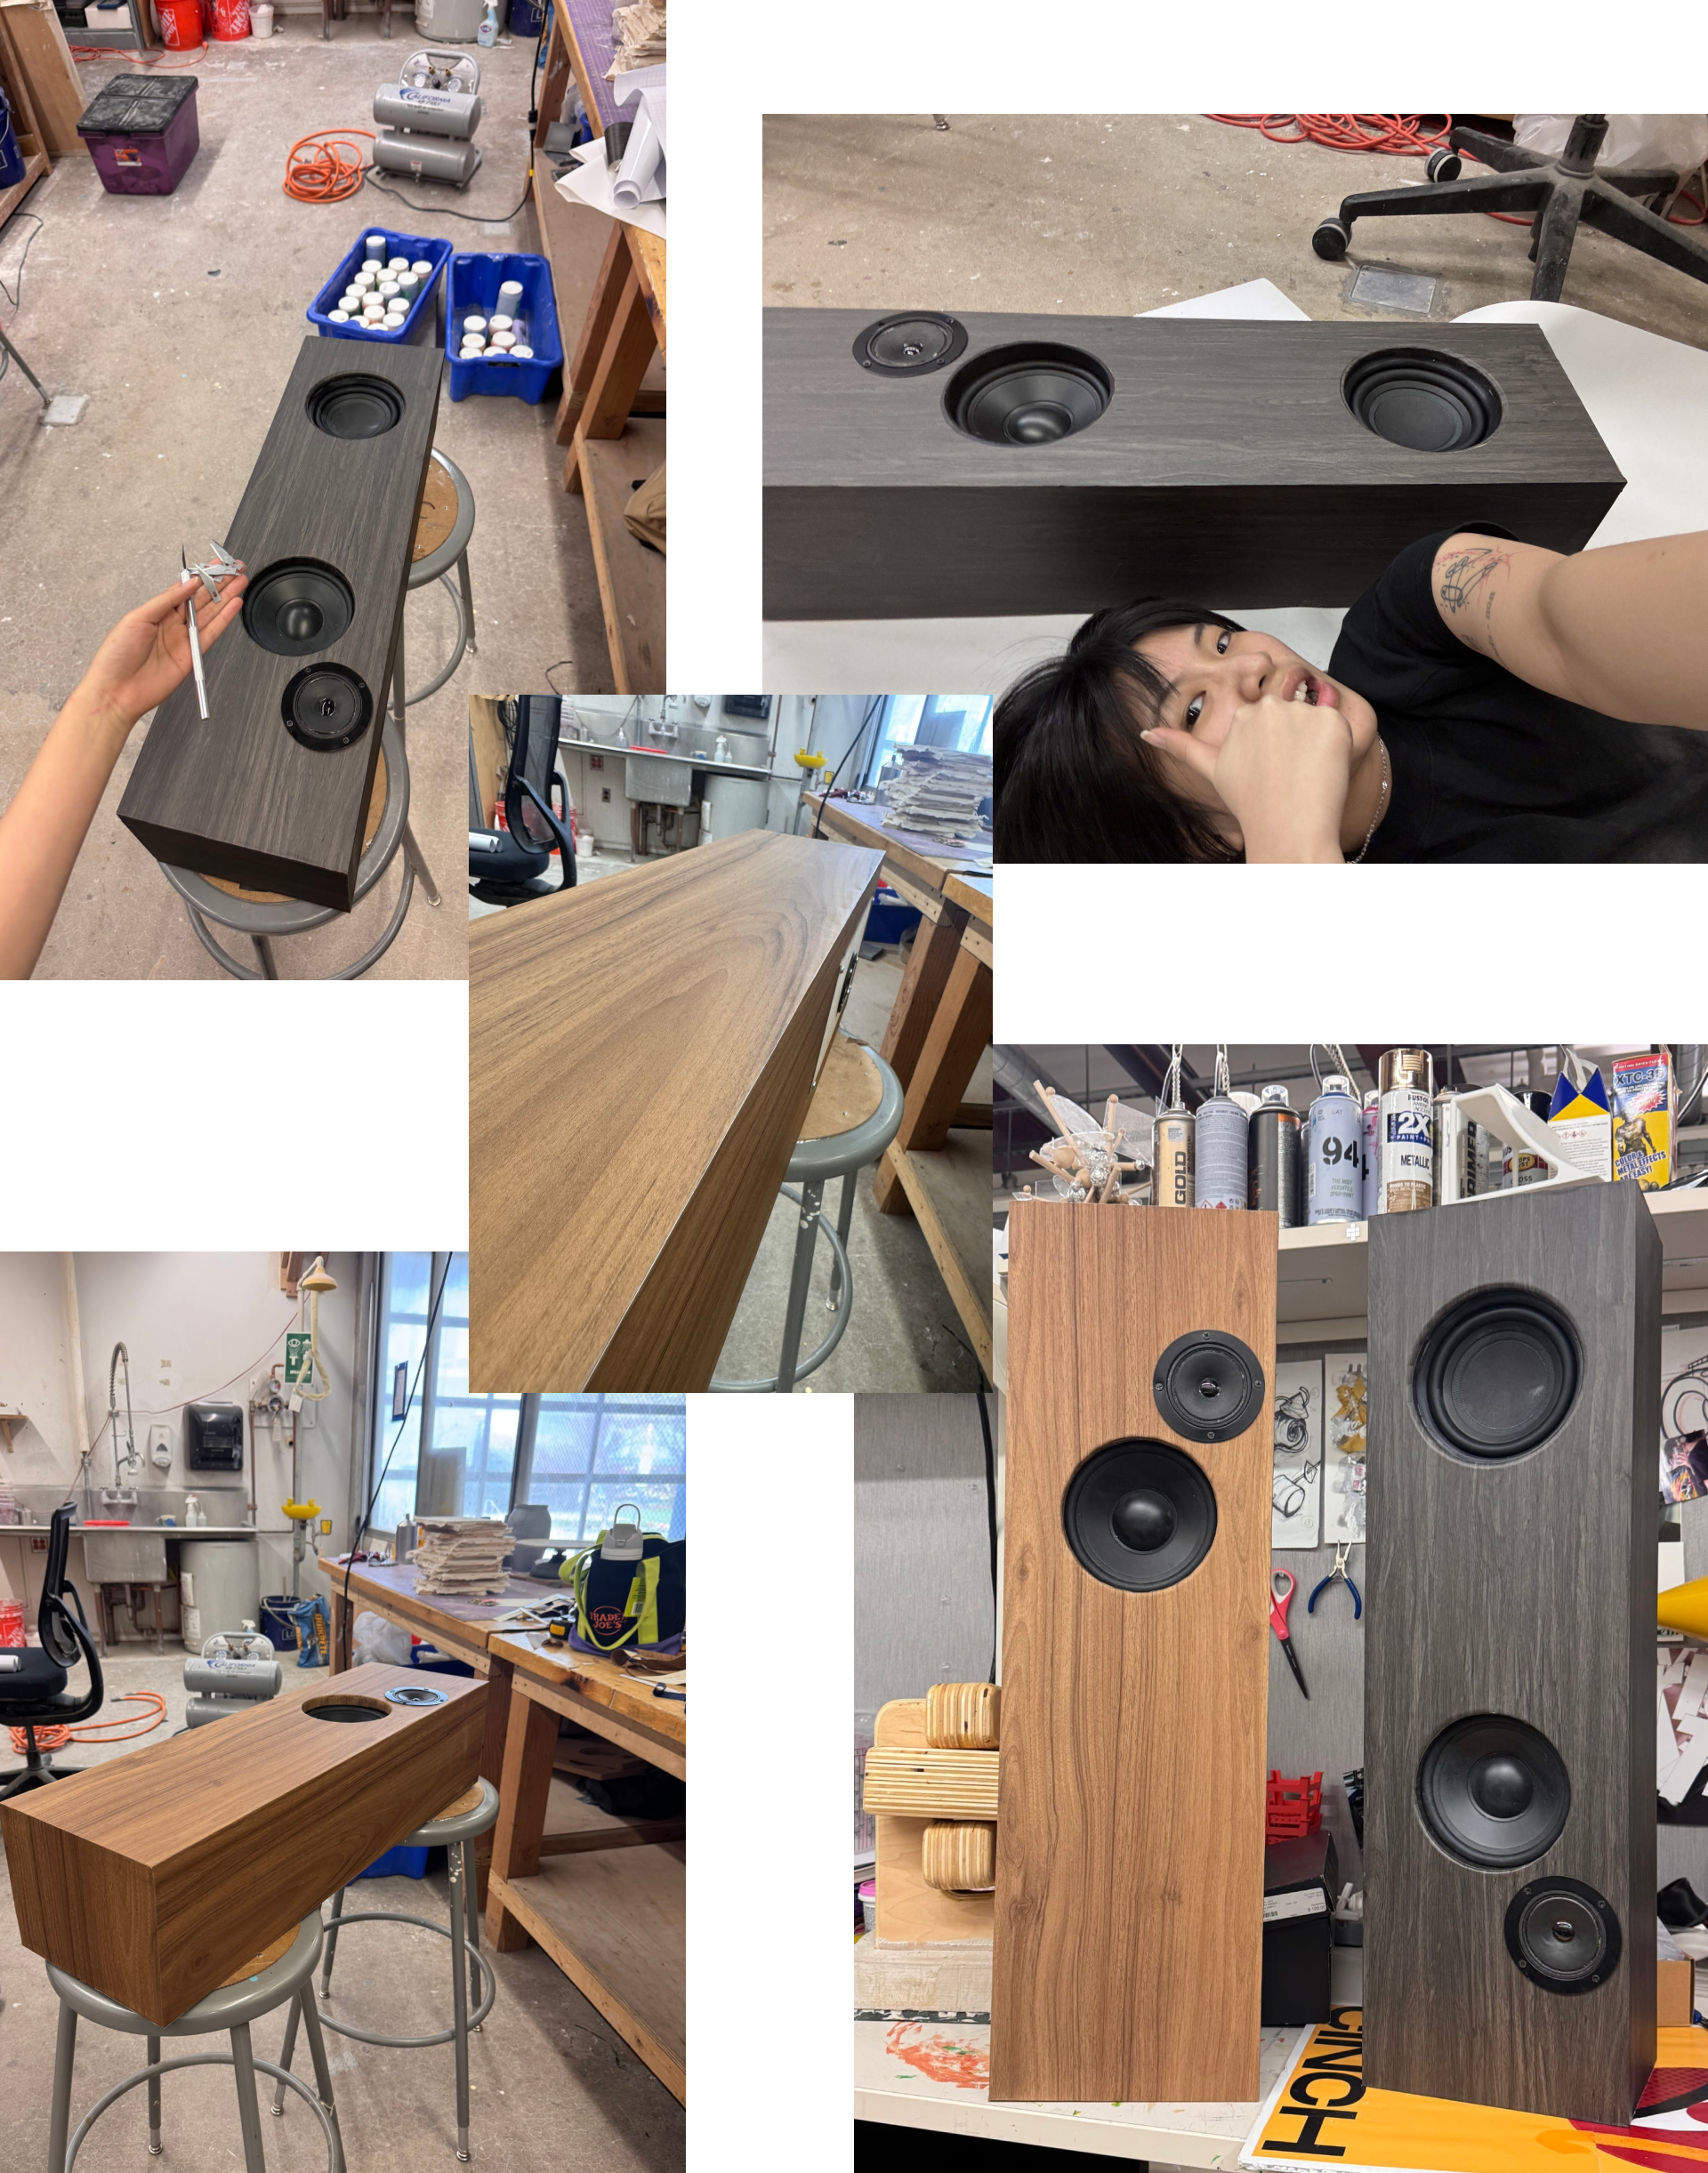
To keep the final build cost-effective without sacrificing the wood aesthetic, I chose a high-quality wood-grain vinyl wrap instead of real wood veneer. I selected two contrasting wood colorways to create the visual direction I wanted while still preserving the texture and appearance of natural grain.
Applying the vinyl required careful measuring, alignment, and trimming with an X-Acto knife, especially along the exposed edges where every cut needed to be clean and straight. My first attempt resulted in uneven cuts and a messy finish, so I removed it, practiced the technique, and wrapped the enclosure a second time. Through trial and error, I improved my control and precision, resulting in much cleaner seams and a more refined final finish.
Stencil & Spray Painting
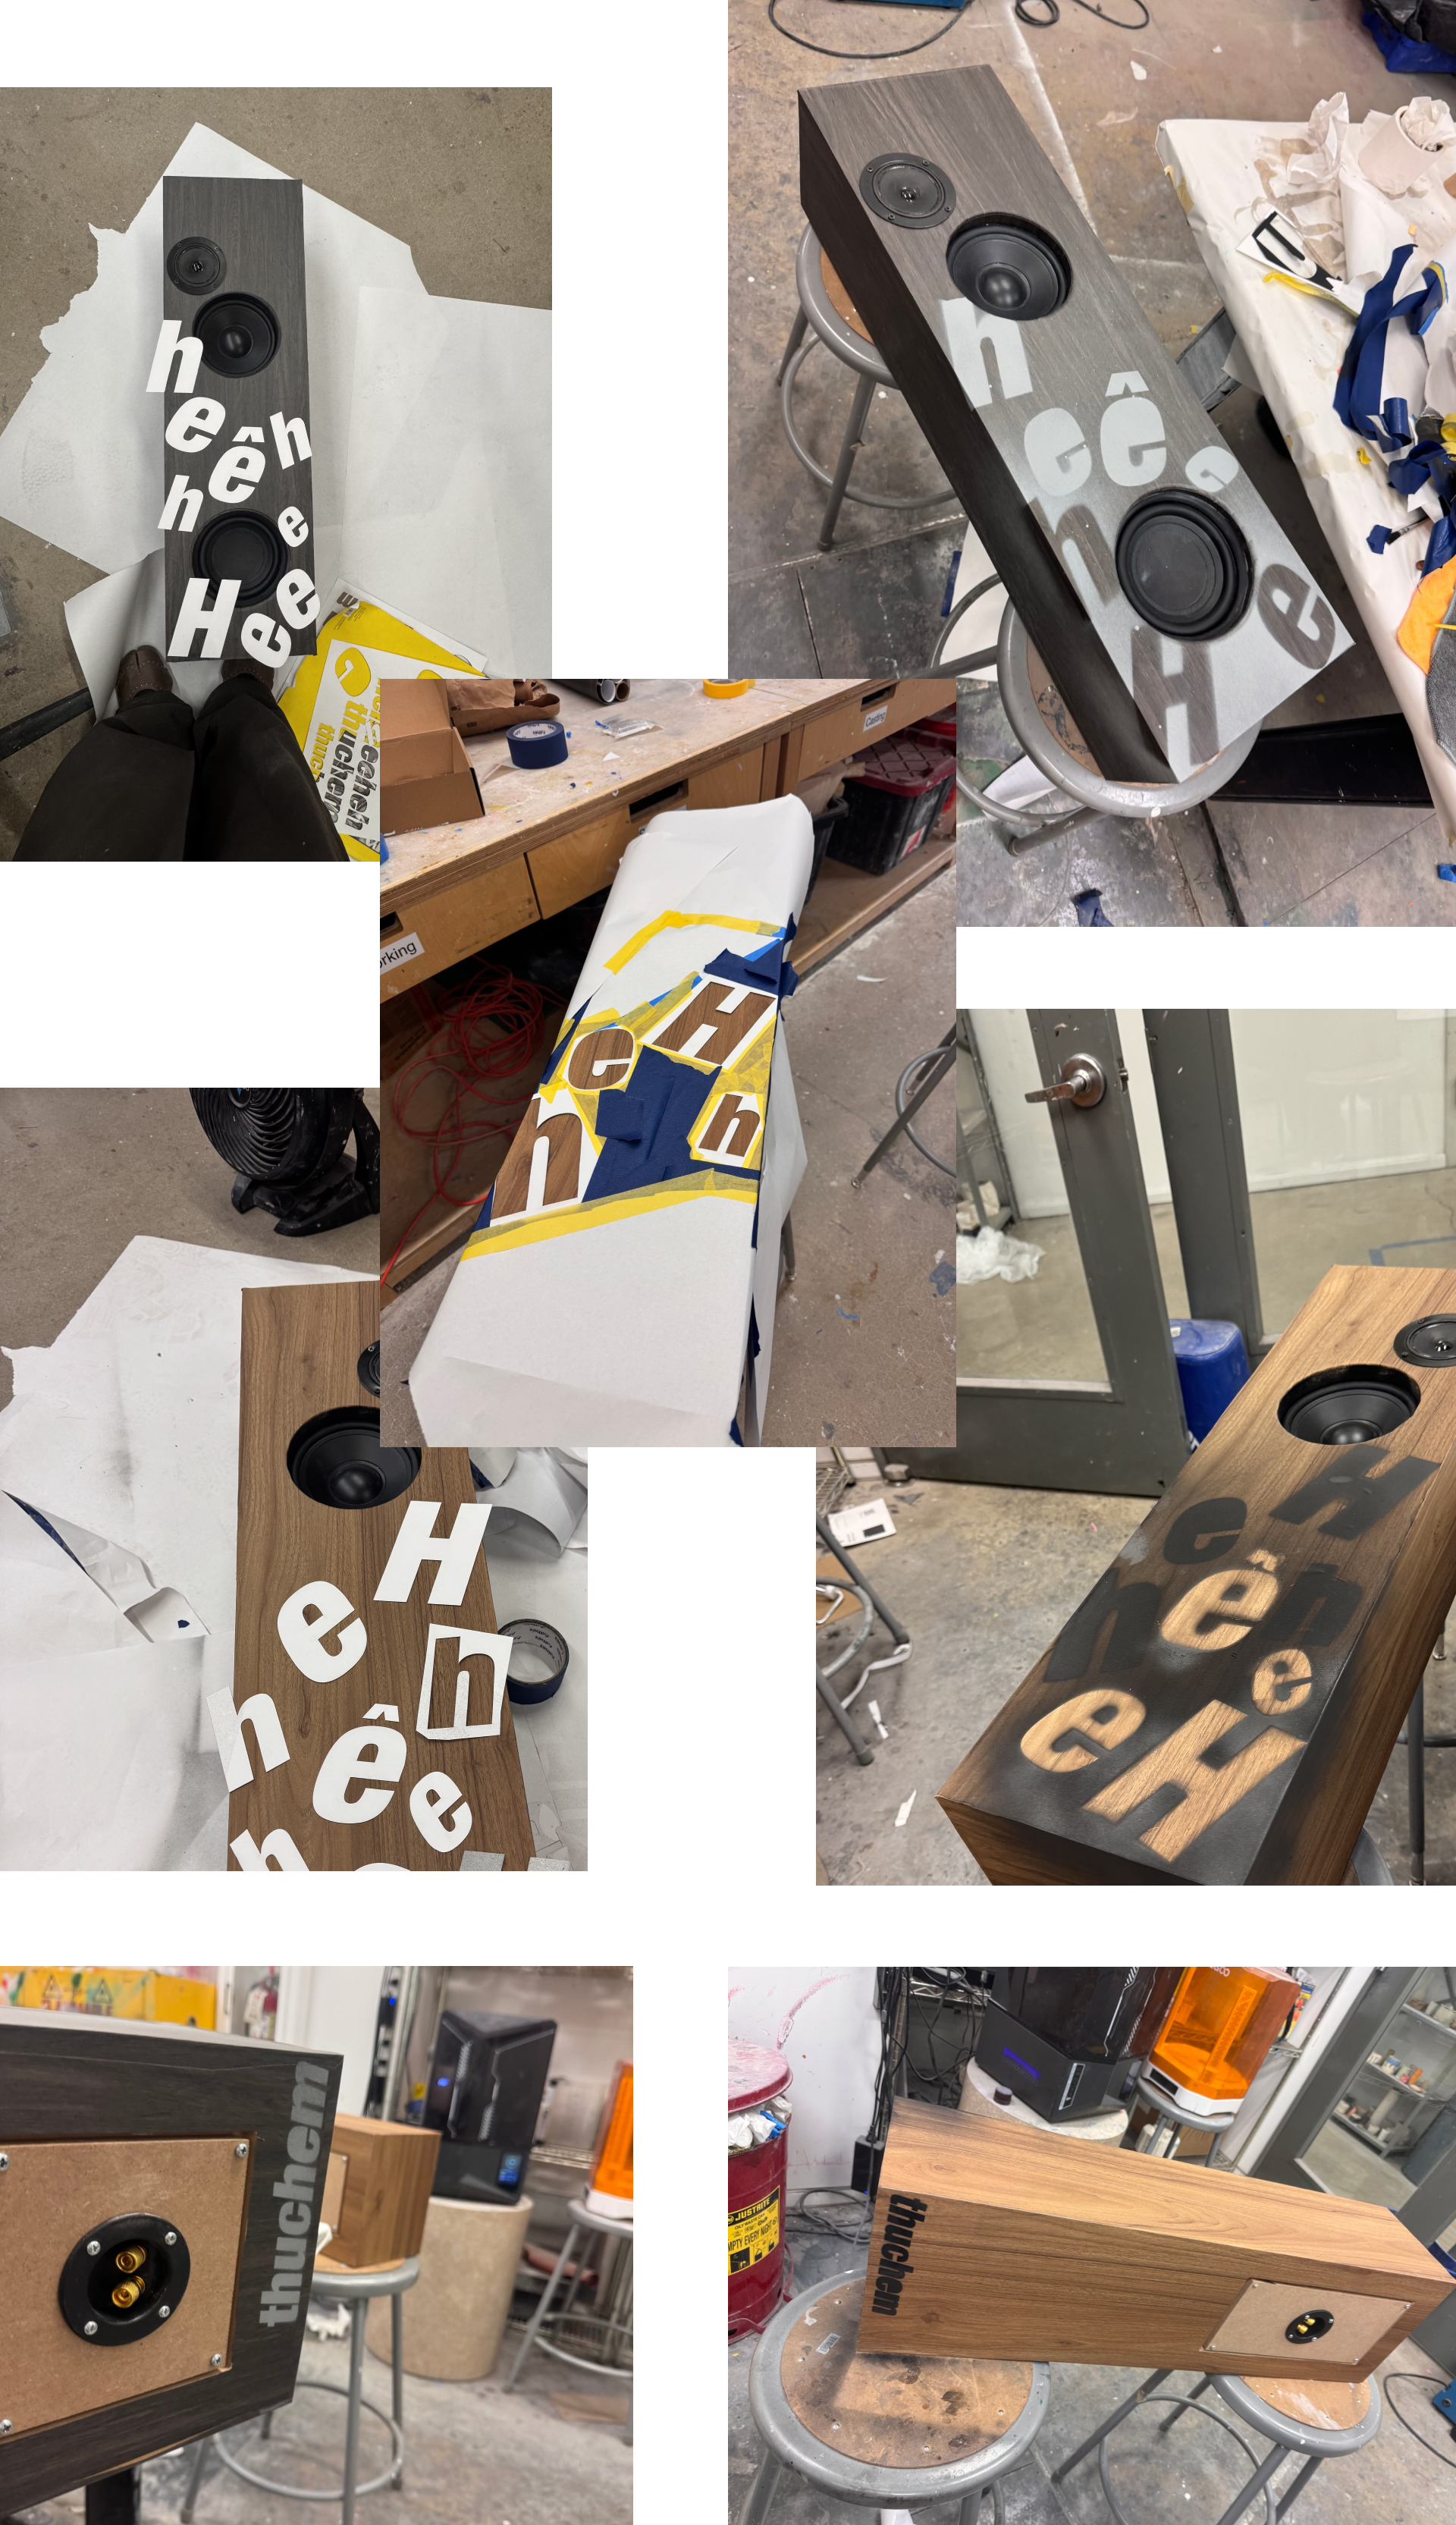
To bring my personal identity into the speakers, I created a custom stencil based on "heheheheheheh," a recurring element of my personal brand, and laser-cut the pattern from Bristol paper. Rather than following a rigid composition, I freestyled the placement across opposite sides of the speakers, arranging the letters to feel as if they were falling and scattering across the surface.
I used both positive and negative stencils, securing and masking each area with paper and tape before applying Montana spray paint. On the grey wood, the paint creates a subtle, washed-out effect, while on the brown wood, it creates a darker, burnt-wood aesthetic. As a final personal detail, I also added my signature to the lower back of each speaker, treating the finished pieces almost like signed objects and reinforcing the connection between the speakers and my personal design identity.
Showcase